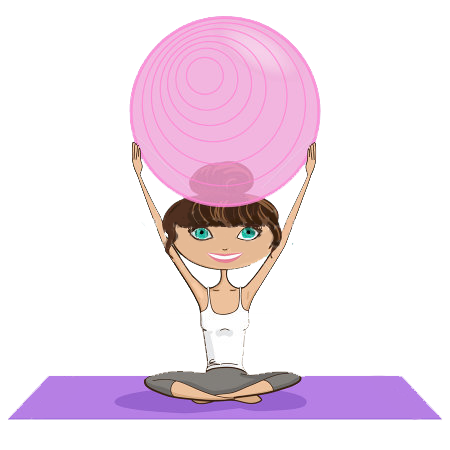
What is Pilates?
“Pilates is complete coordination of body, mind and spirit. Through Pilates you first purposefully acquire complete control of your own body and then through proper repetition of its exercises you gradually and progressively acquire that natural rhythm and coordination associated with all your subconscious activities.” – Joseph Pilates
Pilates is a core focused exercise system.
Pilates consists of low-impact movements that promote flexibility, endurance and muscular strength.
There is a strong focus on body alignment and core strength.
Pilates is a varied group of exercises that can be done with a simple set up or a more complex machine set up depending on the level of an individual’s training and practice.
The most commonly taught classes are “Mat” Pilates classes, which are done using a mat slightly thicker than a yoga mat for exercises, that are mostly taught on the floor.
These classes include hands on corrections from the instructor to insure that proper alignment is achieved.
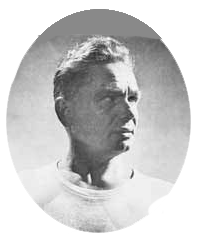
The History of Pilates
Joseph Pilates founded the Pilates System in the early 20th century.
Throughout the early 1900’s Pilates worked as a circus performer, boxer and self-defence instructor.
Using his past knowledge he began to develop the Pilates Technique during World War I.
Pilates developed several of his techniques while working as an orderly in a hospital, assisting injured patients and soldiers in their recovery.
Joseph and his wife Clara emigrated to the US in the early 1920’s and continued developing Joseph’s system which he originally named “Contrology.”
In 1932, Pilates published his first booklet entitled “Your Health” and followed it up with the 1945 title “ Return to Life Through Contrology.”
Joseph Pilates continued teaching his method in New York under the name Contrology until his passing in 1967 when the term Pilates Method became widely used.
His wife Clara is largely credited with the growth and spread of Pilates from their New York studio.
She trained apprentices and helped to evolve and adapt the Pilates Method to each individual client.
After the passing of Joseph Pilates, many of the Pilates apprentices went off and formed their variations of the Pilates Method.
These practices as well as the original teachings of Joseph Pilates can be found in classes all over the world.
Why Pilates is For You
The Pilates Method is one that is easily accessible for anyone looking to increase their fitness and movement ability.
It is an exercise system that requires little more than some space on the floor and can be started at any time in life.
Pilates is a system that does not matter if you have never exercised, or have taken a long break, even the most physically fit individual can still benefit from the practice.
As with any exercise system it is best to get clearance from a doctor before beginning.
Additionally, Pilates is an excellent exercise system to implement when recovering from injury.
The overall control and precision of each exercise combined with its original purpose to rehabilitate makes Pilates a very effective exercise system.
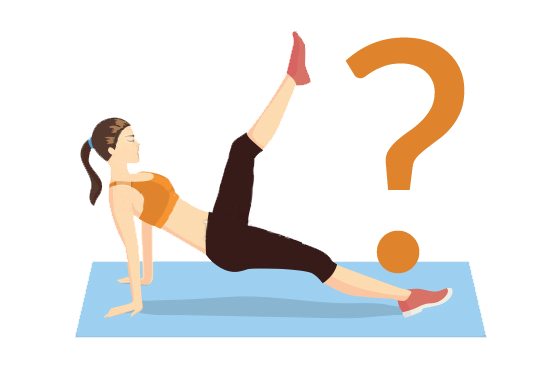
Pilates Styles
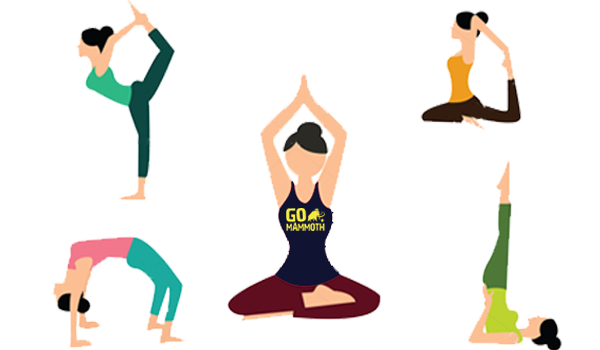
There are two main types of Pilates;
Studio Apparatus
This style must be practiced in a studio using certain equipment. The traditional studio apparatus are: the Cadillac, the Ladder Barrel, the Reformer and the Wunda Chair.
These machines utilise, gravity, spring loaded resistance and movement to create the required environment.
Matwork
It can be practiced with instruction in groups or one on one and does not require any specific dedicated space. The positions are performed on the mat and often times small equipment items are used to aid in resistance. Commonly used equipment are balls, blocks, bands and chairs.
Additionally, Pilates movements are used by many Physical Therapists as a way to aide in rehabilitation after injury.
While those are the two main types of Pilates recognised there are several different “styles” as many Pilates trained teachers branched off to create their own styles using the Pilates Method as its base and adding on their own ideas. The most well known is;
Stott Pilates
Developed by Lindsay and Moira Merrithew along with sports medicine and physical therapists. This system is derived from the original Pilates teaching with the exception that exercises are taught while maintaining the curvature of the spine, versus the flat back approach created by Joseph Pilates.
The Incredible Health Benefits of Pilates
According to the Mayo Clinic, the main health benefits of Pilates include;
- Improved posture and balance
- Improved flexibility
- Improved stability
- Increased core strength
Additionally, a study from the “Journal of Orthopaedic & Sports Physical Therapy”, showed that in just four weeks many participants reported lower instances of low back pain.
While these studies are ongoing, the data points to clear benefits in terms over overall body flexibility, strength and stability.
The Long Term Pilates Benefits
The main long term benefits found over years of Pilates practice are;
- An expanded body awareness
- Improved Posture
- Return of specific body movements
- Rehabilitation of injuries
- Positive mental health changes
It has been shown that the Long-Term Effects of exercise massively benefit individuals mental health.
In a study on the “Long-Term Effects of Aerobic Exercise on Psychological Outcomes”, a group of researchers found that after only 12 weeks of aerobic fitness programs, participants reported significant benefits remained after a year.
Additionally, a study in the Mayo Clinic Proceedings found, that a series of Back-Strengthening exercises performed by woman between the ages of 49 to 65 significantly improved their spinal posture.
The Research Behind Pilates
Joseph Pilates created the Pilates Method as a way to rehabilitate individuals during his time as an orderly in a hospital setting, as he developed this method many people began to receive benefits from the practice.
Due to its origination as a rehabilitation exercise, Pilates exercises are commonly taught by Physical Therapists and have since been studied rather in depth.
A study in the Journal of Strength & Conditioning from March 2010 found that two 60- minute Pilates sessions per week showed significant gains in abdominal endurance, hamstring flexibility and upper body muscular endurance.
Additionally, all the Pilates activities undertaken in this study were mat based and could easily be done without equipment.
A study was also conducted on healthy adult individuals to determine if Pilates exercises could help increase balance.
Over the course of completing 10 Pilates exercise sessions it was found that there was in fact a gain in balance amongst participants.
As the practice of Pilates continues to grow, so do the number of studies performed.
There is a large focus on long term health outcomes within the ageing population and how preventative exercises can create lasting effects.
Pilates is one of these exercises that will continue to benefit all populations.
Your Beginners Pilates Blueprint
All you will need to begin your Pilates adventure is a mat or towel, a thicker mat or yoga mat is best for added cushion, an open mind and a bit of space to move comfortably in. If you sign up to a Go Mammoth class, we provide the yoga mat.
To begin:
Come to a seated position, anythings that is comfortable for you. Spend the next few moments just focusing on your breath.
As slowly as possible roll down to a reclining position. This will become your starting position for Beginner Pilates Exercises.
Neutral Spine/Constructive Rest:
This exercise will help you find a neutral spine and will be where we start and reset before each exercise.
Getting Into The Pose:
- Lie flat on your back with your arms resting at your sides.
- Bend your knees, place the soles of your feet on the ground about hip distance apart.
- Inhale deeply through the nose.
- “>Exhale, and use your abdominal muscles to press your lower back into the floor.
- >Inhale as you release
- Exhale and raise your abdominal muscles towards the ceiling, creating an arch in the low back.
- Inhale as you release
- Repeat this 5 times
- Inhale as you release, this time leaving the low back pressed firmly into the ground beneath you.
Tips:
- As you move try to keep a relaxed sensation in your shoulders, neck, arms and legs.
- Look straight up, making sure not to drop your chin towards your chest.
Head Nod:
The head nod is incredible important in Pilates activities, it is useful in keeping a relaxed neck during reclining exercises and used during roll up and forward bending exercises.
<pGetting into the Pose:
- Begin in your neutral position.
- Inhale, lengthen your spine by drawing your chin towards your chest without lifting your head away from the ground.
- Exhale, return to neutral
- Inhale, tip the head back slightly, lifting the chin upward.
- Exhale, return to neutral.
- Repeat this 5 times, flowing with your breath.
Tips:
- Keep the shoulders relaxed.
- Resist the urge to pull your chin down and instead let the action come from lengthening your upper spine.
- Be mindful of any neck pain or tension.
Arms Overhead:
Arms overhead will help you to begin to keep strong focused alignment. It also helps to increase shoulder range of motion.
Getting into the Pose:
- Begin in neutral position with the low back anchored to the mat.
- Inhale, lift the fingertips up towards the ceiling.
- Exhale bring your arms down toward the floor behind you. Keeping the abdominal muscles engaged.
- Inhale, bring the arms back up.
- Exhale, release your arms to your sides.
- Repeat this 5 times.
Tips:
- Keep your abdominal muscles engaged the entire time.
- Do not allow moment to draw your arms overhead, keep a very focused movement.
- Try to keep your ribs from lifting up.
- If your arms can not drop all the way back to the floor comfortable, take them back only as far as feels comfortable, overtime range of motion will increase.
Angel Arms:
Angel arms will help you to understand the proper movement and alignment of the body. Creating a movement in the arms that will help you to keep the proper engagement of the shoulders, back, abdominals muscles and ribcage.
Getting into the Pose:
- Begin in neutral position.
- Inhale, sweep both arms out to the sides along the floor.
- Exhale, arms return back down by the sides.
- Repeat this 5 times.
Tips:
- Keep the abdominal muscles engages and the ribs down.
- The shoulders should not lift up with the arms. Keep them relaxed and away from the ears.
Pelvic Clock:
The Pelvic clock will help you to bring a deeper awareness to your pelvic position.
Getting into the Pose:
- Begin in neutral, however this time imagine a clock resting on your abs. Your belly button is at the 12 position, the 3 is on your left hip bone, the 6 is on your pubic bone and the 9 is on your right hip bone.
- Using your abdominal muscles to initiate this movement, begin to move around the clock, exhale, pulling the navel downward, inhale to the 3, exhale to the 6 and finally inhale to the nine. Return to the 12.
- Reverse and go around the clock in the opposite direction.
- Repeat this 3 times in each direction.
Tips:
- This is an incredibly small movement.
- If the breathing feels uncomfortable just allow yourself to breathe naturally.
- Your hips should not raise off the floor.
- Attempt to move your pelvis without moving the rest of your body.
Knee Fold:
This movement will help you to move the legs without affecting the stability in your pelvis and spine.
Getting into the Pose:
- Begin in neutral position.
- Inhale, use the lower abdominal muscles to lift the foot off the floor, drawing the knee up towards the chest.
- Exhale, slowly release the leg back down to the floor, being sure to use the abdominal muscles on the release.
- Repeat 3 times on one side before switching to the other.
Tips:
- Keep the neck and shoulders relaxed
- Allow your focus to be entirely on the abdominals contracting to lift the leg away from the ground and to release it back down.
Ab Scoops:
The ab scoop targets the abdominal muscles specifically, however it is not a crunch.
Getting into the Pose:
- Begin in neutral position.
- Keeping your shoulders down, bring your hands behind your head with the tips of your fingers touching. Your hands will be supporting the weight of the head and the elbows will stay open, not pulled towards the ears.
- As you exhale, slowly pull your belly button down toward your spine, keep a strong engagement here as you slowly draw your chin towards your chest, let your shoulders lift just until they graze the mat beneath you.
- Pause as you reach the top, inhale, draw the abdominal muscles in deeper.
- Exhale, keep the abdominals engaged as you lower the shoulders and head down. Coming back to your neutral spine.
- Inhale to release the abdominals.
- Repeat 6 times
Tips:
- Try to not allow any momentum to come into this posture.
- Do not curl the tail bone off the floor.
- Find a steady and controlled breath to help find the proper movement in this posture
The Hundred:
The hundred targets the abdominal muscles and brings a deep focus into utilising the breath while keeping the abdominal muscles engaged.
Getting into the Pose:
- Begin in neutral position.
- Inhale
- As you exhale lift the head, keeping the chin down, curl your upper back up off the floor. Keep your gaze down towards your navel.
- Inhale
- Exhale, deepen your abdominal engagement. Reach your arms forward and extend your legs out towards the wall in front of you.
- Your legs should be low enough that you can control your abdominals and not feel shaking.
- Your arms are low to the ground, reaching from the fingertips.
- Take 5 short breaths in and out, as you do begin slightly pumping the arms, keeping a controlled manner here as you move. This is a very small movement of the arms.
- Do 10 full breaths as you pump the arms in unison with your breath,
- Keep the abs scooped, back flat on the floor and your shoulders are relaxed.
- To release keep you spine curved and bring your knees into your chest, slowly roll down to the back.
Tips:
- Pay attention to your breath here for optimal results.
- Keep the arm movements slow and controlled.
- If having the legs extended is too difficult, keep your feet on the floor with knees bent.
The Roll Up:
This is a classic Pilates move and is great for sculpting a strong abdominal section.
Getting into the Pose:
- Begin lying flat on the back with the legs extended straight.
- Let the belly muscles drop down towards the floor. Keeping the rest of the body relaxed.
- Begin to reach your arms overhead, fingers pointing towards the wall behind you.
- Inhale, bring your arms up overhead, as they reach your ears, drop the chin and begin to lift the head and upper back up.
- Exhale, keep curling the body up towards your toes.
- Deepen the abdominal pull further.
- Inhale, keep the head tucked and the abdominals engaged as you slowly roll down to the back.
- Once your shoulders reach the floor, extend the arms back up overhead.
- Repeat 6 times.
Tips:
- Try to keep your breath and movement synchronized
- If you have trouble with this keep your knees bent.
One Leg Circle:
This will challenge your core and your pelvic stability.
Getting into the Pose:
- Lie on the back with legs extended in front of you.
- Engage the abdominal muscles.
- Draw one knee towards the chest and extend it overhead.
- Inhale, cross the extended leg up towards your opposite shoulder.
- Exhale, lower the leg down towards the centre line of the body, keeping a circular motion.
- Use control to sweep the leg out to the side and then back to center.
- Repeat 5 times circling in each direction before switching legs.
Tips:
- You can keep the non working leg bent if it helps to stabilize the hips.
- Keep the extended knee bent slightly if tightness in the hamstring feels uncomfortable.
- Try to keep both hips firmly grounded
Rolling Like a Ball:
This will help to create a deep abdominal engagement, spinal elasticity and breath support.
Getting into the Pose:
- Come to a seated position with knees bent and feet resting on the floor.
- Wrap your hands over your shins.
- Widen your back as you deepen your abdominal pull.
- Keep the neck long, do not tuck the head here.
- Lift your feet off the mat and balance on your seat.
- Inhale, pull the lower abdominal muscles up and in and slowly roll back onto the shoulders. Keeping the neck lifted away from the ground.
- Exhale, use your abdominals to return to seated.
- Repeat 5 times.
Tips:
- This is best done on a padded surface.
- Use your breath to keep in control here.
- Do not allow momentum to fling you backwards and forwards.
Open Leg Balance:
This balance helps to fire up the core muscles and also creates a stretch and extension of the hamstrings.
Getting into the Pose:
- Begin seated at the front of the mat with knees bent and both feet resting on the floor.
- Exhale, bend your knees towards your chest, lifting the feet away from the ground.
- Inhale, pull the navel in toward the spine, creating a deep belly engagement.
- Begin to find a balance here as you extend your legs out and up towards the ceiling. Letting the legs separate slightly.
- Your body should appear like a v shape, with hands holding on behind the knees lightly.
- Use the abdominal muscles to stay engaged, keeping the shoulders relaxed.
- Balance to a count of 5, while keeping a strong breath.
- Slowly tuck the knees back in towards the chest, release the feet to the floo
- Repeat 3 times.
Tips:
- It is important to have the spinal lengthening more than the legs straight, if the back begins to round, keep a bend to the knees.
- If both legs extended feels like too much, practice lifting one at a time.
The Side Kick Series:
The side kick series uses the abdominal muscles for stability while creating toning and length in the thighs and strengthening in the hips.
Getting into the Pose:
- Lie on one side keeping the ears, shoulders, hips and knees in a straight line.
- Prop your head up with one hand, lifting your ribs away from the mat. If that is uncomfortable you can modify by extending your arm straight up, letting your head rest on the upper arm.
- Keep the front hand resting firmly on the ground with the palm down, providing stability.
- Allow the legs to come slightly ahead of the hips.
Side Kick Front/Back:
- Lift the top leg a few inches, flex the foot. Pressing strongly forward from the heel.
- Begin to draw the leg forward, keeping a controlled movement as you kick forward.
- Pause for a breath.
- Slowly kick the leg backward without losing the support of your low back.
- Repeat this 5 to 10 times.
Side Kick Up/Down:
- After completing the Front/Back Kick return to your Side Kick starting pose with body in a long line, head supported in hand.
- Pull the abdominals up and in.
- Lengthen here and lift your top leg up towards the ceiling, toes pointed towards the ceiling.
- Slowly control the leg as you bring it back down.
- Repeat 5 to 10 times.
After completing the repetitions on each side come back to a comfortable seated position to take a few breaths.
Tips:
- Be incredibly mindful of keeping a strong core and deep back support.
- Use your breath to help control the leg kicks.
Front Support/Plank:
This is the ultimate full body Pilates pose, it requires incredible focus, precision and control.
Getting into the Pose:
- Begin on hands and knees.
- Placing your hands on the floor, shoulders distance apart with fingers pointing forward.
- Lean forward to bring your weight towards your hands, letting your shoulders come directly over the wrists.
- From the knees keep the abdominal muscles lifted, slowly extend one leg back and then the other. Toes are tucked under and weight is resting in the balls of the feet.
- Keeping the legs firmly together, let your heels press together and activate your legs.
- Breathe deeply, holding for 5 to 10 breaths.
- Take a break and repeat up to 5 times.
Tips:
- Remember to keep the body in a straight line.
- If you begin to shake, gently release from the pose and reset with breath.
- If you feel keeping the legs straight is too difficult, you can keep the knees resting on the floor for a few breaths.
Wall Roll Down:
The ultimate full body stretch and a great way to find your way to better posture as you finish your practice.
Getting into the Pose:
- Stand with your back pressed into a wall.
- Walk your feet 6 to 8 inches away from the wall.
- Pull your abdominals in on an exhale.
- Keep your shoulders away from the ears as you raise your arms overhead with an inhale.
- Keeping the arms parallel to your ears, slowly nod your head and begin to roll your spine away from the wall, vertebrae by vertebrae.
- Hips stay firmly pressed against the wall as your continue to roll down.
- Deepen the curve of your spine here and go down as far as you can comfortable without losing the abdominal stability you have engaged.
- As you find your deepest curve let your head and neck relax.
- Use your abdominals to begin your roll back upward.
- Finishing with your arms extended up overhead.
Tips:
- Only go down as far as feels comfortable to maintain your abdominal engagement.
- Focus on your breath fully.
- Try to think about length in the spine as you roll down and back up.
Pilates Principles
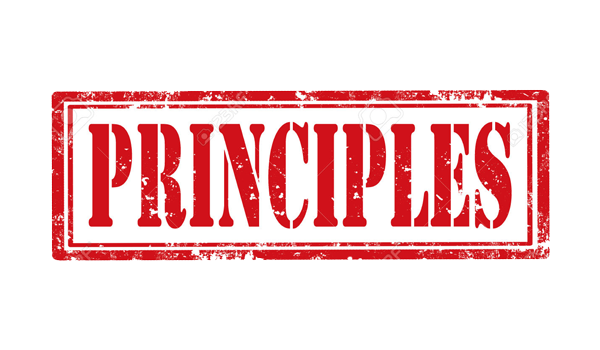
The Pilates Principles are the best place to start as a beginner.
Understanding that the principles set the foundation for every Pilates exercise, these are traditionally;
- Breath – Joseph Pilates referred to the lungs as bellow and emphasised a very full breath with each exercise. Pilates exercises are all coordinated with breath.
- Concentration – each exercise should be completed with your full concentration in order to get the maximum benefit.
- Centering – All Pilates exercises are sourced from the centre of the body, the abdominal area is considered the powerhouse of Pilates and each exercise beginning by bringing focus to that area.
- Control – Every movement is done with complete control, each part of the body is on board and never left out.
- Precision – This comes from focusing on each movement, placement and alignment of the body.
- Flow – Pilates exercises are done in a flowing manner, using fluidity and ease throughout each movement.
After that there are just a few things that will help to make your Pilates experience more pleasant!
Don’t push yourself too hard
It can be easy to over exert yourself in any form of exercise, but it is more important to listen to your body!
Slow Down
Pilates is all about Control and Precision, using momentum to make things “easier” will not help you in the end. It is best to go slowly and really focus on the activity you are doing.
Patience
It is difficult to do something continuously and see immediate results, the benefits from Pilates come with practice and time. So be patient with yourself and you will slowly see results over time.
Minimise your distractions
Phones and emails and texts are the norm for most people these days, however one of the main Pilates Principles is “Concentration,” so give yourself the ability to really concentrate on your routine!
Make Space
This is two-fold, you need to make space in your day/life for your Pilates routines. However, you also need a little physical space to practice at home, it need not be a permanent space, just somewhere that feels calming and allows you a little room to stretch out!
Find a Routine that works for You
You will find that if something is really working for you, you may tend to do it more often. So find a routine that fits in with your needs and what you’d like to work on.
Conclusion
Pilates is an incredible system of exercise to begin.
It has the ability to ease stress in the body and mind.
The benefits go far beyond the physical body changes that will occur.
Undertaking this practice will help create calm and peace within the mind.
Try beginners pilates positions in a Go Mammoth class – check out our list of available London class locations.
“Physical fitness is the first requisite of happiness. Our interpretation of physical fitness is the attainment and maintenance of a uniformly developed body with a sound mind fully capable of naturally, easily, and satisfactorily performing our many and varied daily tasks with spontaneous zest and pleasure.”